



Aluminum Honeycomb Panel Installation: Step-by-Step Guide for Contractors
Aluminum honeycomb panels are installed using a subframe or direct-fix method, with panels mechanically fastened to a structural backing system. Proper handling, alignment, and sealing ensure long-term performance on facades, ceilings, and interior partitions. Factory-pre fabricated panels reduce on-site work and improve dimensional accuracy.
Understanding Aluminum Honeycomb Panel Construction
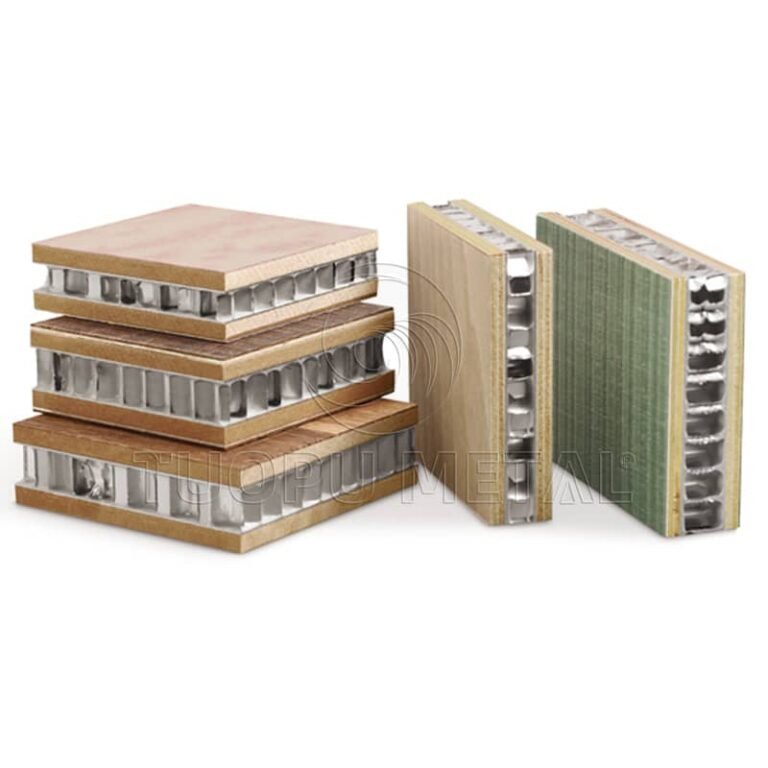
Before any installation begins, contractors should understand what goes into an aluminum honeycomb panel. The core consists of an aluminum honeycomb matrix bonded between two aluminum face sheets. This sandwich construction delivers high stiffness-to-weight ratios, making the panels ideal for both curtain wall and interior applications.
Core Specifications and Material Grades
- Aluminum alloy 6063-T5 or 6063-T6 is standard for structural honeycomb panels
- Core cell sizes typically range from 6 mm to 12 mm, selected based on required stiffness and panel span
- Face sheet thickness commonly ranges from 0.7 mm to 1.5 mm depending on load requirements
- Panel thickness options typically span 10 mm to 50 mm for architectural use
- Recycled aluminum content can reach up to 75%, supporting sustainability targets
Surface Treatment Options
The surface finish selected for a honeycomb panel directly affects its maintenance profile and aesthetic lifespan. Powder coating typically delivers 60 to 80 microns of film thickness with a 25-to-30-year warranty. PVDF coatings, such as Kynar 500-based systems, provide 25 to 30 microns of coverage with a 30-year color-retention guarantee. Anodized finishes range from 15 to 25 microns and carry a 20-plus-year warranty. Wood grain transfer coatings are available on a standard warranty basis.
Pre-Installation Planning and Preparation
Successful honeycomb panel installation depends heavily on preparation. Contractors should complete the following steps before panels arrive on site.
Site Survey and Subframe Verification
- Verify that the primary and secondary subframe is plumb, level, and aligned to the design drawing tolerances
- Check that anchor points and mounting brackets are positioned according to the panel layout schedule
- Confirm that all structural steel or aluminum framing meets the load-bearing requirements for the selected panel weight and wind load
- Inspect the weather-resistant barrier or building wrap for continuity and proper sealing at all penetrations
Panel Handling and Storage
Honeycomb panels must be stored flat on a level surface with adequate support along their full length. Vertical storage is acceptable only when the manufacturer specifies it and protective capping is in place. Panels should remain in their original packaging until installation. Avoid dragging panels across each other, as the face sheet finish can be scratched. Use vacuum lifters or edge grips designed for large-format panels to prevent deformation during movement.
Tools and Fasteners Required
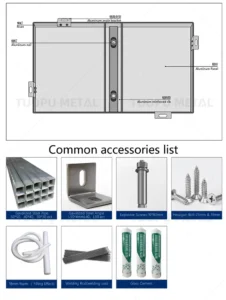
Standard installation requires a drill driver, Torx or hex bit set, level, measuring tape, rubber mallet, caulk gun, and a panel lifting frame for sheets larger than one square meter. Fasteners should be stainless steel or aluminum-compatible to prevent galvanic corrosion. Use isolated washers or non-conductive spacers between dissimilar metals.
Installation Procedure for Facade Applications
Step 1: Install the Subframe and Mounting Rails
Begin by fixing the vertical and horizontal support rails to the building structure. Spacing must correspond to the panel dimensions and the engineered load calculations. Use slotted holes where thermal movement is expected. Verify each rail is square before tightening fasteners fully.
Step 2: Lay Out Panel Positions
Mark the exact location of each panel on the subframe using the installation drawing. Include expansion joints at designated intervals. Mark fastener hole positions on the rail system before panels are lifted into place.
Step 3: Set the First Panel
Start from a corner or a reference line indicated in the drawing. Lift the panel into position using a vacuum lifter. Align the pre-drilled holes with the mounting rails. Insert the fasteners hand-tight first, then use a torque-limiting driver to avoid over-compressing the honeycomb core. Do not fully torque until the panel is verified plumb and level.
Step 4: Maintain Expansion Joints
Aluminum expands and contracts with temperature changes. Leave the joint gap specified by the panel manufacturer between adjacent panels and at all perimeter edges. Use compression spacers or silicone backer rod to maintain consistent gaps during installation.
Step 5: Seal Joints and Penetrations
Apply a high-quality silicone or polyurethane sealant rated for architectural aluminum. Use a backer rod to control sealant depth and ensure a two-to-one width-to-depth ratio. Tool the sealant bead for proper adhesion and weather resistance. Install gaskets or weather strips where the panel meets adjacent materials such as glass, stone, or concrete.
Step 6: Final Torque and Inspection
Once all panels are in place and sealed, go back and apply final torque to every fastener. Inspect each panel for surface damage, misalignment, or sealant defects. Clean the panel surfaces with a manufacturer-approved cleaner before handing over the installation.
Installation Procedure for Ceiling Applications
Exposed Grid Systems
For drop-ceiling applications, honeycomb panels are designed to sit directly into standard 15/16-inch or 24/25-inch mineral fiber grid systems. Panels are typically 12 mm thick and drop into the grid without additional framing. Ensure the grid is level and that the suspension wires are tensioned to prevent sagging over time.
Suspended Clip Systems
For concealed or semi-concealed ceiling installations, use a clip-and-rail system. Attach the rails to the overhead structure, then snap the panel edges into the clips. This method provides a clean aesthetic with no visible fasteners. Verify that the clip spacing matches the panel edge profile.
Acoustic Performance Considerations
When acoustic performance is required, select perforated honeycomb panels paired with an acoustic backing material such as mineral wool or foam. The Noise Reduction Coefficient can reach 0.85 or higher when the correct backing is used. Ensure the backing material does not compress the honeycomb core and that airflow paths remain unobstructed.
Quality Control and Post-Installation Checks
| Check Item | Acceptance Criteria | Method |
|---|---|---|
| Panel flatness | No visible waviness or oil-canning | Visual inspection at oblique light angle |
| Fastener torque | Within manufacturer specification | Torque wrench verification |
| Joint gap consistency | Within ±1 mm of design gap | Feeler gauge or spacer check |
| Sealant adhesion | No gaps, pinholes, or separation | Visual and pull-test |
| Surface damage | No scratches, dents, or coating defects | Visual inspection under adequate lighting |
| Drainage and weep paths | Unobstructed and directed away from the building | Water test or visual inspection |
Common Installation Mistakes to Avoid
- Overtightening fasteners, which can crush the honeycomb core and reduce panel stiffness
- Skipping expansion joints, leading to thermal buckling in large facade areas
- Installing panels in direct sunlight without shade, causing adhesive cure issues and thermal distortion
- Using incompatible sealants that stain the coating or fail to adhere
- Neglecting to protect panel edges during transport and installation, resulting in core exposure to moisture
- Ignoring the manufacturer’s handling instructions for large-format panels
Frequently Asked Questions
What is the typical thickness range for architectural aluminum honeycomb panels?
Architectural aluminum honeycomb panels are typically available in thicknesses from 10 mm to 50 mm, with 20 mm and 25 mm being the most common selections for facade and ceiling applications. Thicker panels are used where higher stiffness or greater span is required.
Can aluminum honeycomb panels be used for exterior curtain walls?
Yes. Aluminum honeycomb panels are widely used in exterior curtain wall systems. They can be specified with A2 fire-rated construction and are compatible with unitized and stick-built curtain wall systems. Fire-rated assemblies with 1-to-2-hour ratings are available as an option.
What is the expected service life of the surface coating on honeycomb panels?
Surface coating service life depends on the finish selected. Powder-coated panels typically carry a 25-to-30-year warranty. PVDF-coated panels typically carry a 30-year warranty. Anodized finishes typically carry a 20-plus-year warranty. Actual longevity depends on environmental exposure and maintenance.
Are aluminum honeycomb panels recyclable?
Yes. Aluminum honeycomb panels are 100 percent recyclable. The aluminum core and face sheets can be recovered and reprocessed at end of life. Some products offer up to 75 percent recycled aluminum content, and Environmental Product Declarations are available for select product lines.
What certification and compliance standards apply to FstopMetal honeycomb panels?
FstopMetal products are manufactured under ISO 9001 quality management systems and carry CE marking for European market compliance. SGS verification is available for quality assurance. Panels can be specified to meet ASTM and EN international standards, and EPD documentation is available for select product lines.